
First order of business was to learn about GPIO and how to light LEDs, detect input, wiring, etc. It started with lighting an LED from a Python script, then detecting a state change of a push button wired to a GPIO pin.
Luckily, the Pi has a great deal of documentation and tutorials online explaining the operation so getting started was far easier than with the CubeMX. Taking input to Pi was done using Python. To get started with the Pi, a few packages needed to be installed. To install programs on the Pi, the Terminal had to be used along with its commands.
Typical commands:
To Install: $ sudo apt-get install Program

To Update: $ sudo apt-get update  To Apply Update: $ sudo apt-get upgrade
This was needed to be done for both Python and GPIO, to access the pins as an input the following code was used, a pull-down resistor was used in the wiring, therefore, it must be specified in the code. To wire the Pi, jumper cables are recommended as they are easy to switch between pins.

The above diagram shows the pin layout for the Raspberry Pi 3. This is very helpful for general use and I would recommend setting this as the desktop background for the Pi, this makes for easy wiring when using the GPIO pins.
import RPi.GPIO as GPIO # imports GPIO calling it GPIO

GPIO.setmode(GPIO.BCM) # setting up pins
GPIO.setup(4, GPIO.IN, pull_up_down=GPIO.PUD_DOWN) # pin4 as input using pull down
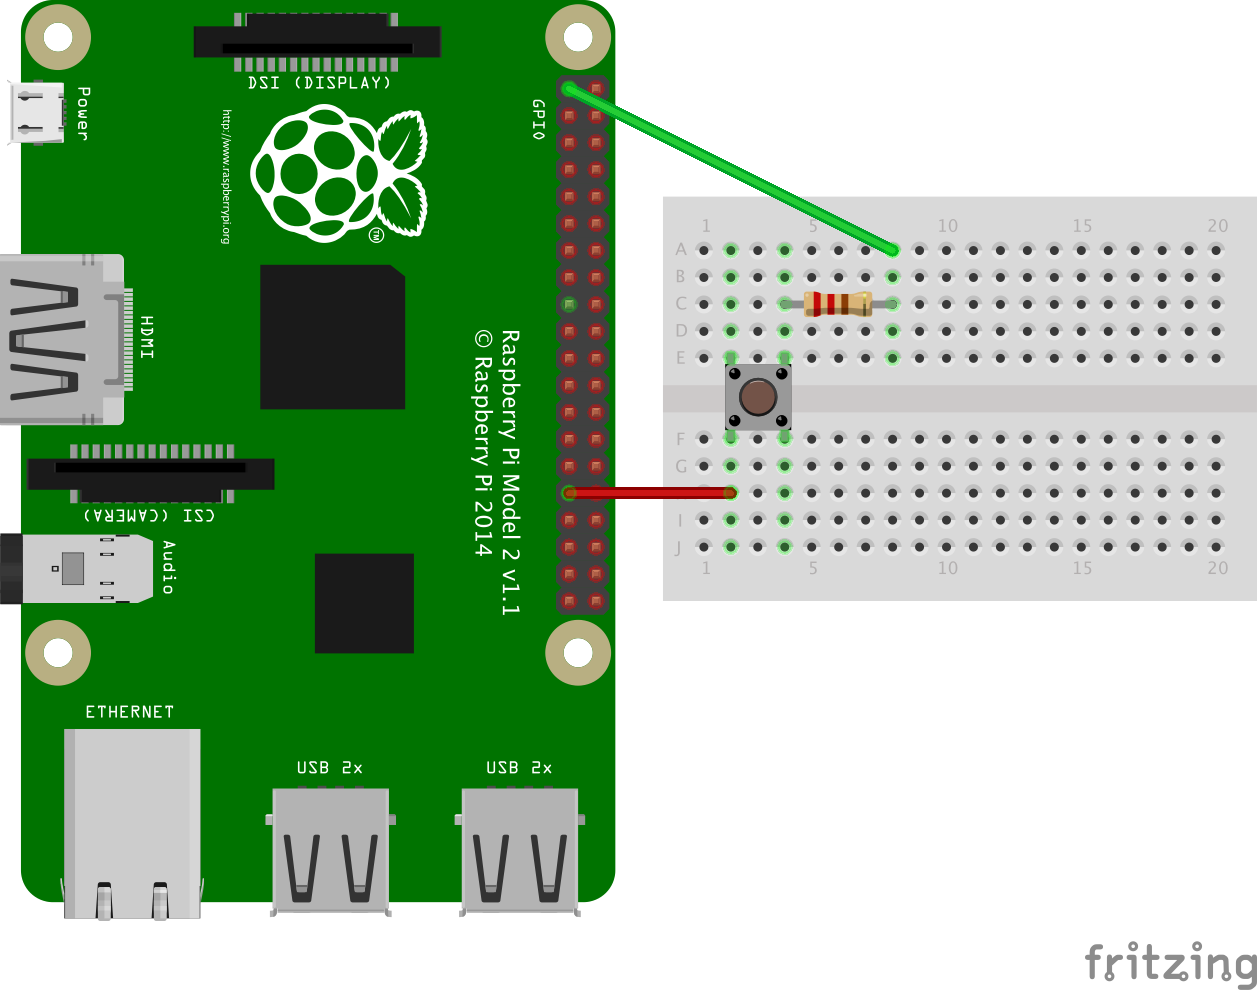
The above diagram shows the button connected to a breadboard and a resistor to prevent damaging the GPIO pin.
import RPi.GPIO as GPIO  # GPIO library
GPIO.setmode(GPIO.BOARD) # set up BOARD pin numbering
GPIO.setup(10, GPIO.IN)  # set GPIO10 as input (button)
GPIO.setup(12, GPIO.OUT) # set GPIO12 as output (LED)

try:
  while True:
    if GPIO.input(10):    # if port 10 == 1
      print ("HIGH")
      GPIO.output(12, 1)  # tuns LED on
    else:
      print ("LOW")
      GPIO.output(12, 0)  # tuns LED off

finally: # this block will run no matter how the try block exits
  GPIO.cleanup()          # resets pins
A script was then written to detect a state change from an input pin which then lit an LED from a GPIO pin. Luckily, Python’s syntax is very easy to use which allows tasks to be done far faster than could be done with lower level programming languages like C.
